Copying is good thing – unless you are taking a test! Why reinvent the wheel when other teachers can help get you started. We have created a new User Role for Moodle which allows you to collaborate/share items from your course with another teacher. This new Collaboration Share role will allow another teacher to browse your course and look at your items but not change anything. This new role will also allow the other teacher to make a copy and import your course materials into their course. It’s kinda like window shopping. You add another teacher to your course and assign them the Collaboration Share role. They can enter your course and view all your stuff. If they see something they like they can use the Import option to bring your stuff into their course.
How do we set this up on our site? Follow these steps below.
Moodle site administrator must create the new Moodle role
The Moodle site admin must create a new role by going to Site Administration > Users > Permissions > Define Roles and click on “Add New Role” button.
You will want to use our Collaboration Share Role Preset which can be downloaded here: Collaboration Role Preset NOTE: Change the file extension from .zip to .xml before uploading to Moodle.

Allow People to Assign this Role
Still in the Define Roles area of the Site Administration area, we need to allow role assignments. Click on the “Allow Role Assignments” tab at the top of the page. 
Check off the column for Collaboration Share as seen in the photo. Teacher, Course Creator, and Managers should all be able to assign other users the Collaboration Share role.
Let teachers share content
Now that we’ve created the Collaboration Share role it is time to let teachers know how to use it. For clarity of instruction I will use the following terms: Teacher and Copycat. The teacher has all the materials and the copycat wants to borrow the materials.
Step One: Let’s collaborate!
The teacher and copycat have been talking. The teacher shared some amazing stories of how the kids use pre and post tests in Moodle to gauge their understanding of the material. Copycat is afraid of technology but sees how successful teacher is with her students. Copycat reluctantly create a Moodle course but it is empty and doesn’t even know where to begin. Luckily, teacher enrolled copycat into her course with the role of Collaboration Share. This new role allows copycat to look at the teacher’s course but not change anything. Copycat likes all the quizzes that teacher has created.
Step Two: Import
Copycat goes to their empty course. In the Administration block copycat notices an Import link. When copycat clicks import she is excited to see teacher’s course listed in her options! Low and behold, when copycat selects teacher’s course all the items are ready for import. Quizzes, resources, activities, everything is listed and copycat can pick and choose what to import. Copycat can pick and choose what items to get started with and follow the steps to complete the import process.

Step Three – Cleanup
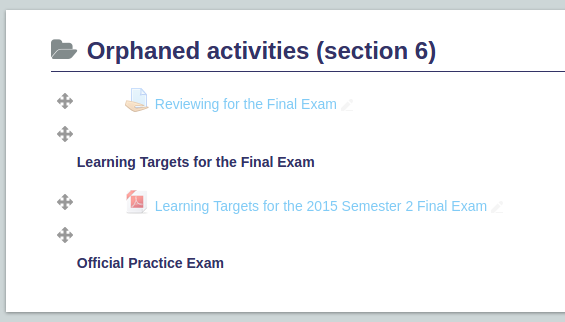 When you import something from another course Moodle doesn’t know where you want to put it so it does a 1 to 1 transfer. Meaning, things in topic one on the other course will be imported into your topic one. If your course only has 5 topics but the other course had 10 topics then the items in topics 5 thru 10 will appear as “orphaned” activities. All you need to do is drag them into place or add a few more topics to your course so that you can view the orphaned files and move them to where you want them to go. With editing turned on click the “+” sign below the last topic in your course and it will add a new topic. Do so until you see all the orphaned activities. TURN EDITING ON to see the orphaned files at the bottom of the main course page.